Time for rapid countertops

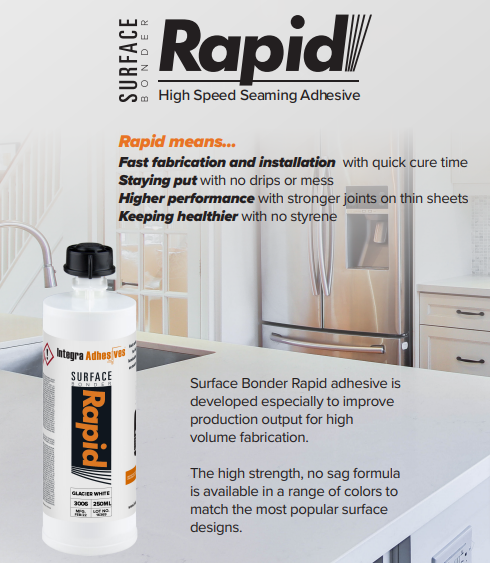
Using the best products and materials for your manufacturing operation is imperative. Your tools, equipment, and materials need to meet your high standards, which is why we keep a full inventory of products from Integra Adhesives, a leader in glues and materials for various surfaces, including countertops.

Integra Adhesives’ (Integra) Surface Bonder Rapid is one of the top options for anyone who manufactures products that will be exposed to cold temperatures. With winter around the corner, you can create high-quality, reliable products with Surface Bonder Rapid from Integra! (And you can do it fast!) 

About the Surface Bonder Rapid

Surface Bonder Rapid is a specialty adhesive designed for faster production output. It dries faster —without sacrificing strength — reducing wait time and significantly increasing productivity. That’s great if you’re a high-volume manufacturer who needs things done quickly. Because this adhesive is specifically designed to cure in half the time of other products, your fabrication efforts can continue with peak efficiency. 

Rapid can be used in many situations, but it’s ideal for mitered edges, deck seams, and vertical applications. It’s no drip. With a high strength, it gives better performance to thinner sheets and can be counted on to create long-lasting surfaces. 

Various materials can be fabricated with Surface Bonder Rapid, including: 

  • Natural stone
  • Quartz
  • Compact ceramics 
  • Porcelain 

Surface Bonder Rapid has a working time of 4 to 8 minutes and a fixture time of 10 to 16 minutes, so your team can apply the adhesive and start working on the material faster than ever.

To meet your specific needs, Surface Bonder Rapid is available in a variety of colors, including shades of gray, brown, white, and black to match every application. Integra has a lab that combines advanced technology and practical knowledge to create color matching that is unsurpassed in the industry. But you don’t need to call their lab to get color information. You can use their app or contact us!

Comparing Rapid to other surface bonder products

We know selecting a specific surface bonder can be tricky. It’s why we developed a comparison chart, so you can select the best Integra Adhesives product for the job. Use this chart from the technical specs and know which product is best for which substrate (stone, engineered stone, porcelain, marble, etc.) and job.

Compare Integra Adhesives Glues

Your source for Integra Adhesives

Integra has a full line of top-quality adhesives, but they do not sell directly to customers. To get their products (which are in high demand), you need to work with a preferred vendor. That’s Elevated. 

We’re proud to be one of the leading vendors for Integra Adhesives, with more than 4,000 tubes of Integra products available in warehouses across the nation. We can offer two-day shipping to most locations and have over 100 colors in stock. Plus, we can break a case for those smaller jobs. Our service is unparalleled with people committed to seeing your business succeed. And we carry all lines of surface bonders as well as a range of other countertop products such as caulks and polishers.  

To improve your manufacturing and fabrication process, contact us. We have a staff of industry experts, ensuring you get the right materials to increase productivity while reducing costs.

Everything you need to know about leak audits

If your compressed air system has an air leak, that could cost a fortune in wasted energy and air. This is not hyperbole, and it’s not an exaggeration. 

Manufacturing facilities spend a massive portion of their total energy costs on compressed air alone. Estimating exact costs is difficult (taking into account factors such as system size, compressor power and storage, leak size, and the cost of electricity in your area), but Fluid Power Journal Supply has published data estimating the annual cost of a quarter-inch leak to be around $18,000—a half-inch leak can cost large facilities around $74,174 a year!

Regardless of the total, one fact remains: air leaks are a waste of energy, money, and vital resources. Large or small, routine leak audits are critical to your system’s overall performance and affordability. 

What are leak audits?

An audit of your compressed air system is the first step to determining your system’s needs. An audit will find problems that are causing your profits (quite literally) to seep into thin air. 

Leak audits can be completed in a variety of ways. In many cases, a professional can simply conduct a walk-through evaluation of the system and identify clear issues that are wasting compressed air. A walk-through, however, is not enough to identify all the small cracks and gaps that could be causing inefficiencies. 

A more thorough assessment of the air-compression system is often required and may include a review of key dynamics, such as pressure drops when the system is not operating. (Hint: if the pressure is dropping and the compressor runs continually during off hours, you likely have leaks!) 

Professionals can also complete a full leak audit, which includes reviewing energy usage, analyzing air measurements, implementing leak-detection measures, and performing a maintenance review. 

When complete, an air-compression professional will identify key factors that are harming your system and causing air leaks. Depending on audit findings, a system technician may recommend repairing or replacing worn parts or mismatched fittings and, in some cases, installing a new compressor when appropriate. 

Why are leak audits important? 

Leak audits are important for many reasons — but most importantly, they save money. Leak audits help identify and fix issues and, once upgrades are complete, reduce the total demand placed on a compressor. The compressor does not need to run as often, significantly reducing your energy bill. 

When a compressor runs more than it should, it wears down faster than it would’ve otherwise. Leak audits can streamline your overall system maintenance and even reduce the need for new equipment. That’s some savings; new compressors, especially advanced industrial units, can cost tens of thousands of dollars. A leak audit, followed by appropriate repairs and maintenance, can extend the life of these expensive compressed-air machines.  

Get reliable experts to help with your leak audit

If you’re looking to save money on energy or conduct air leaks because you suspect issues, turn to Elevated! We’re an authorized Kaeser distributor in South Carolina, Dayton, and Cincinnati. And we’re known for our compressed air services, such as preventive maintenance and audits. Our technicians handle all major compressor brands, not just Kaeser. Quincy, Champion, Atlas Copco, Gardner Denver, Ingersoll Rand — we can analyze them all.

We’ll provide a thorough audit and deliver clear recommendations on vital system maintenance, new machines you might need, parts to install, or how you can save energy and money.

Using a manometer in a spray booth

The manometer in your spray booth needs to be installed and calibrated properly. To achieve the best results, follow these simple steps for installing, calibrating, and using a manometer.

What is a manometer? (And why is it important?) 

A manometer is a gauge that tells paint-booth operators when a filter needs to be changed. Essentially, it measures the pressure at two points: before the filters and after the filters. The difference between the front and back of a filter tells operators when it needs to be changed. If there’s a significant difference, the filters are ready for replacement. 

As buildup occurs inside a paint booth, the pressure difference between the pre and post-filter locations will vary. Pressure will increase, and the performance of a paint booth will suffer. Not only is performance hurt, but filters that aren’t changed (and need to be) could be considered a safety hazard.

Install and calibrate in 10 easy steps

Installing a manometer is simple. By following these steps, you can easily add a new manometer to your paint booth: 

  1. Temporarily mount the new manometer on an outside booth panel, preferably near the frame of the exhaust filter.
  2. Find the high and low-panel penetrations and install the bulkhead fittings. This should be near eye level and approximately 9 to 12 inches on either side of the exhaust filter.
    Tip: While not a requirement, it’s best to have the same length of tubing from the high and low fittings. The high-pressure manometer port (before the filters) should, in most cases, be on the left, while the low-pressure port (after the filters) should be on the right. 
  3. Remove the manometer from the panel and level upright on a table.
  4. Turn the zero-set knob counterclockwise until it stops. 
  5. Turn in three full clockwise rotations. Zero should now be roughly in the middle. 
  6. Remove the fill plug and fill the gauge with fluid (usually red). Fill until it reaches zero on the scale. (You can make minor adjustments after remounting.) 
  7. Place the fill plug back on the manometer. 
  8. Verify there’s enough fluid by turning the knob counterclockwise in a complete rotation so fluid can travel past the 0.5 reading. If the gauge is overfull, you can use a pipe cleaner or straw to wick out the extra fluid. 
  9. Turn the knob counterclockwise, so it again rests at zero. 
  10. Mount and level the manometer. 

Now, your paint booth should be ready for ideal performance!

Maintain your manometer

Maintenance of a manometer ensures it continues to work correctly while giving you important information about filters. 

When new filters are in place, you can start the system. At this point, you should mark the starting pressure difference by placing a green arrow where the gauge currently rests to act as your benchmark pressure reading. Add a red arrow to show when the pressure difference is too much.

Depending on your location (different locations have different air-quality laws), you may need to place the red arrow at .25 inches or .5 inches. 

Get the right manometers, spray booths, and filters

Elevated Industrial Solutions can help ensure you get the right manometer, spray booth, and filters. We can also help you install one.

Our industry experts can review your coating and finishing system, getting you exactly what you need to maintain paint consistency and save money on paint. Plus, we have access to industrial supplies and safety equipment to protect your workforce. Nationwide, we’re easy to partner with.

5 common issues found in compressed air systems

A faulty air compressor can waste energy and resources at your facility. But, by keeping an eye out for common issues, you can keep your air compressor running efficiently.

1. Excessive operating temperatures 

Yeah, overheating. Air compressors shouldn’t exceed a temperature threshold for efficient functionality. A common cause of this issue is skipping maintenance visits. Regular maintenance visits by an experienced technician are the most important factors in keeping your air compressor running issue-free. It should be easy to schedule, too. Ask for recommendations, based on your environment, for maintenance if a warranty isn’t provided. 

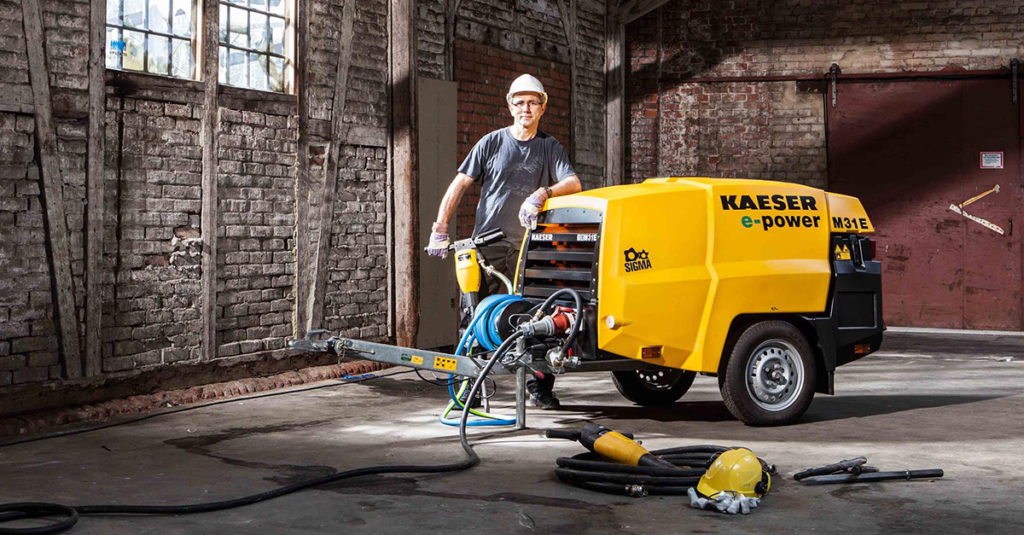
mobile compressors

2. Air leaks

The Department of Energy estimates that roughly 20% to 30% of wasted energy from air compressors is due to air leaks. Leaks result in constant output fluctuation and a shorter compressor lifespan. So, addressing air leaks is one of the first steps to saving energy costs at your facility.

3. Choked airflow

If your air compressor isn’t outputting enough airflow, a few different factors could be causing the issue: obstructed intake filters, a bad pressure gauze setting, or a faulty coupler. If you’re unsure of the source of the obstruction, ask a compressor, can cut down the time required to get your compressor back up and running. 

4. A failing compressor

Air compressors that fail to start, stop, or provide enough pressure may be experiencing compressor failure. A common cause of compressor failure is inadequate oiling. Failing air compressors may be repaired, but in some cases need to be replaced. 

5. Uncommon sounds

Loud, weird noises or vibrations produced by your air compressor may indicate a problem. Possible issues include improper mounting, faulty pistons, or loose components. A vibration analysis could help determine the source.

Get help with the root cause

It can be difficult to pinpoint the root cause of your air compressor issues. If you’re struggling to determine the problem and perform the required repairs, Elevated Industrial Solutions is here to help. Our professionals have decades of experience in diagnosing and repairing faulty air compression systems. We can recommend new solutions and rentals to keep your facility up and running, meaning minimal or no downtime, too.

How to increase your industrial air compressor’s life expectancy

An industrial air compressor is a sizable investment in your business. So, you undoubtedly want it to last as long as possible and avoid spending extra cash on a premature replacement. Plus, you don’t want your compressed air system to fail suddenly, shutting down your production and business for hours while it’s repaired (assuming it can be).  

Luckily, there are several ways you can increase the life expectancy of your industrial air compressor. Our best tips, from our experienced service technicians, include the following.

Regularly change the filters

Air compressors draw in dust, dirt, and debris with every use. And the dirtier your environment, such as a concrete plant, the more debris there is in every use! As a result, air filters can become clogged quite quickly. When the air filter is clogged, your system will have to work harder to operate normally. This results in increased wear and tear, as well as higher energy bills. 

Generally, you should change an industrial air compressor’s filter once per week to prevent wear and tear. 

Ensure proper ventilation

common compressed air maintenance mistakes

Industrial air compressors generate a great deal of heat during operation. Overheating is a common problem, increasing the risk of damage and diminishing your compressed air system’s life expectancy. 

To help prevent overheating, ensure that the room housing the compressor is properly ventilated. Ventilation also reduces the dust and other particles in the air, causing the filters to clog less quickly. 

Check oil levels

Unless you have oil-free compressors or equipment, industrial air compressors must be properly oiled to operate correctly. If the system doesn’t have enough oil, it could incur damage. Make sure to check the system’s oil level before you use it. If it’s below halfway up, top up the oil before running the compressor. 

Schedule maintenance and don’t put off repairs

No matter how minor a repair or maintenance task may be, it could make a big difference in your system’s overall life expectancy. So, don’t delay scheduling maintenance or repairs for your air compressor system. Promptly completing these repairs and maintenance activities will save you money in the long run. 

Get a service technician you trust

Some technicians are available 24 x 7, 365 days a year. They’re there when you need them to quickly get your compressor up and running. Good technicians are also available for maintenance, covering the items on this list, to ensure everything is running at peak efficiency as per your specs. Great companies even provide a warranty with maintenance built into the plan. That warranty is peace of mind that your resources don’t have to spend time worrying about the basics because our technicians will do that for you.

Elevated Industrial Solutions provides maintenance and emergency repair services to help you keep your industrial air compressor in top condition. We have maintenance plans and warranty options to ensure your facility is always up and running. If you’re in South Carolina, Michigan, southern Ohio, or northern Ohio, contact us so we can help you get the maximum return on investment (ROI) for your compressed air system.

    Contact us

    Ready for a partner that supports your business and employees? We’re eager to get started!